
Notice
Recent Posts
Recent Comments
Link
| 일 | 월 | 화 | 수 | 목 | 금 | 토 |
|---|---|---|---|---|---|---|
| 1 | 2 | 3 | 4 | 5 | 6 | 7 |
| 8 | 9 | 10 | 11 | 12 | 13 | 14 |
| 15 | 16 | 17 | 18 | 19 | 20 | 21 |
| 22 | 23 | 24 | 25 | 26 | 27 | 28 |
Tags
- nextjs
- 카카오맵
- es6
- Next
- firebase
- HTML #CSS
- optional chanining
- 카카오맵 api
- CSS
- Python #Baekjoon
- Template literals
- 프로그래머스
- es11
- BOJ
- JavaScript
- Redux
- Nullish Coalescing Operator
- react
- Default parameter
- Python
- HTML
- Hooks
- css #html
- React #Hooks
- Python #CodeUp
- spread operation
- React Kakao map
Archives
- Today
- Total
거북이개발자
[Redux] Redux이용한 CRUD구현(Read) 본문
0. 배경
 |
 |
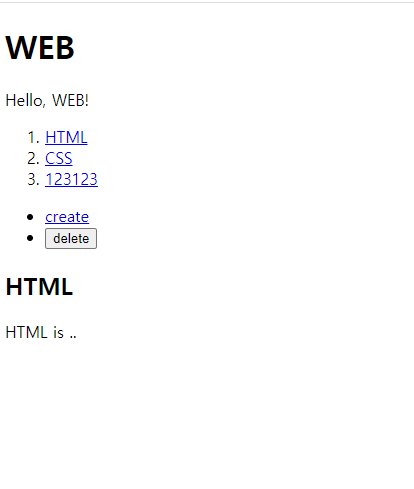
위의 사진처럼 각각의 성분을 읽고, 만들고, 지울 수 있는 기능을 Redux를 이용해서 만들 생각이다.
1.title 목록 만들기
function reducer(state, action){
    if(state === undefined){
        return {
            max_id:2,
            mode:'welcome',
            selcted_id:2,
            contents:[
                {id:1,title:'HTML',desc:'HTML is ..'},
                {id:2,title:'CSS', desc:'CSS is ..'}
            ]
        }
    }}

    var store = Redux.createStore(reducer);
reducer함수를 정의해주고, reducer함수를 인자로 한 store를 만든다.
function TOC(){
    var state = store.getState();
    var i = 0;
    var liTags = '';
    while(i<state.contents.length){
        liTags = liTags + `
        <li>
            <a href="${state.contents[i].id}"> ${state.contents[i].title} </a>
        </li>;
        i = i + 1;
    }
    document.querySelector('#toc').innerHTML = `
    <nav>
        <ol>${liTags}</ ol>
    </nav>
    `;
}
getState를 이용해서 각각의 콘텐츠의 title값으로 목록을 만들 수 있다.
2. title클릭 시 대응하는 본문 출력하기.
<a onclick="
                event.preventDefault();
                var action = {type:'SELECT', id:${state.contents[i].id}}
                store.dispatch(action);
            " href="${state.contents[i].id}">
                ${state.contents[i].title}
            </a>
위의 TOC의 <a> 태그에 onclick를 추가해준다. 그 후
action을 dispatch를 해주면 클릭할 때마다 reducer함수를 실행하게 된다.
function reducer(state, action){
 if(action.type === 'SELECT'){
        newState = Object.assign({}, state, {selcted_id:action.id, mode:'read'});
    }

return newState;

}
reducer함수를 위 코드를 추가해준다.
function article(){
    var state = store.getState();

  if(state.mode === 'read'){
        var i = 0;
        var aTitle, aDesc;
        while(i < state.contents.length){
            if(state.contents[i].id === state.selcted_id) {
                aTitle = state.contents[i].title;
                aDesc = state.contents[i].desc;
                break;
            }
            i = i + 1;
        }
        document.querySelector('#content').innerHTML = `
        <article>
            <h2>${aTitle}</h2>
            ${aDesc}
        </article>
        `
    }

    store.subscribe(article);
그 후 이런 식으로 해주면 본문에 각각에 맞는 설명 값을 출력해준다.
'Redux' 카테고리의 다른 글
| [Redux] Redux기초 프로그래밍 (0) | 2021.02.21 |
|---|---|
| [Redux] Redux이용한 CRUD구현(Delete) (0) | 2021.02.09 |
| [Redux] Redux이용한 CRUD구현(Create) (0) | 2021.02.09 |
| [Redux] Redux의 장점 (0) | 2021.02.09 |
| [Redux] 작동 방식 (0) | 2021.02.08 |
'Redux' Related Articles
more


Comments