Notice
Recent Posts
Recent Comments
Link
| 일 | 월 | 화 | 수 | 목 | 금 | 토 |
|---|---|---|---|---|---|---|
| 1 | 2 | 3 | 4 | 5 | 6 | 7 |
| 8 | 9 | 10 | 11 | 12 | 13 | 14 |
| 15 | 16 | 17 | 18 | 19 | 20 | 21 |
| 22 | 23 | 24 | 25 | 26 | 27 | 28 |
Tags
- Default parameter
- Template literals
- Next
- HTML #CSS
- es6
- Python #Baekjoon
- BOJ
- Nullish Coalescing Operator
- Hooks
- Python
- css #html
- 프로그래머스
- react
- Python #CodeUp
- JavaScript
- spread operation
- React Kakao map
- 카카오맵 api
- optional chanining
- es11
- HTML
- firebase
- React #Hooks
- nextjs
- 카카오맵
- CSS
- Redux
Archives
- Today
- Total
거북이개발자
[React] 컴포넌트 제작, state, 이벤트 사용 본문
1. 목표
리액트를 활용하는 공부.
특히
- 컴포넌트 제작
- state
- 이벤트 활용
을 중점적으로 본다.
2. 결과
 |
 |
 |
 |
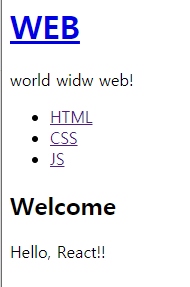
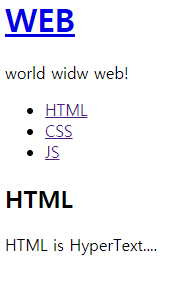
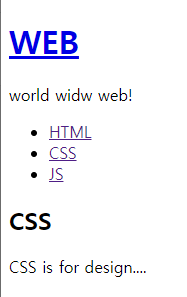
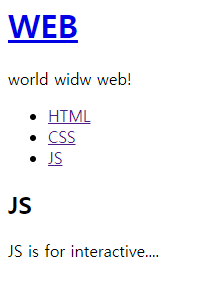
각각의 WEB, HTML, CSS, JS를 클릭하면
위의 사진처럼 밑에 그에 해당하는 글을 표시할 것이다.'
3-1. 깨달은 점(컴포넌트 제작)
1.
class App extends Component{
render(){
return(
 <div className="App">
	<header>
    	<h1>Web</h1>
    </header>
</div>
);

}
}
App.js이다. 위처럼 return에 바로 태그를 입력하여서 <h1> Web </h1>을 출력할 수 있다.
그렇지만 이런 식으로 하면 <header>의 태그가 커질 수 록 감당하기 힘들고 정리가 안된다.
그래서 컴포넌트 제작을 해야 한다.
2. 컴포넌트 제작
import React, { Component } from 'react';

class Subject extends Component{
	render(){
    	return(
        	<h1>Web</h1>
        );

    }
}
이런 식의 Subject.js의 파일을 하나 만들어 준다. 이제 Subject라는 하나의 컴포넌트가 생성된 것이고
이걸 언제든 쓸 수 있다.
import Subject from "./components/Subject"

class App extends Component{
render(){
return(
 <div className="App">
	<Subject></Subject>
</div>
);

}
}
위는 App.js이다. <Subject>로 좀 더 편리하고, 깔끔하게 사용 가능하다.
3-2. 깨달은 점(props)
1.
위의 코드처럼 작성하면 간편하지만 오직 <h1> Web </h1>만 출력하는 기능으로 제한된다.
2.
import Subject from "./components/Subject"

class App extends Component{
render(){
return(
 <div className="App">
	<Subject title="WEB"></Subject>
</div>
);

}
}
Subject 어트리뷰트를 title="WEB"이런 식으로 지정해 준다.
3.
import React, { Component } from 'react';

class Subject extends Component{
	render(){
    	return(
        	<h1>{this.props.title}</h1>
        );

    }
}
그 후 Subject.js를 Web이 아닌 {this.props.title}을 이용하면 "WEB" 뿐만 아닌 여러 텍스트를 삽입이 가능하다.
3-3. 깨달은 점(state)
1.
<Subject title="WEB"></Subject> 이런 식으로 작성 시 타이틀의 인자가 많이 커질 시 코드는 매우 복잡해질 것이다.
그럴 때 state을 사용할 수 있다.
2.
constructor(props){
    super(props);
    this.state={

      subject:{title:'WEB', sub:'world widw web!'},

      ]
    }
  }
이런 식으로 constructor로 state를 설정할 수 있다.
뿐만 아니라
<Subject title={this.state.subject.title}></Subject> 이런 식으로 설정된 state를 사용할 수 있다.
'React > React' 카테고리의 다른 글
| [React] React에 카카오 지도(KakaoMap)API 적용하기 (1) | 2021.02.11 |
|---|---|
| [React] 이미지 파일 읽기 (0) | 2021.01.30 |
| [React] Spread Operator (0) | 2021.01.30 |
| [React] React-Route-Dom (0) | 2021.01.27 |
| [React] create, updeat, delete 구현 (0) | 2021.01.16 |
Comments


